Tire Changes for Zenith Aircraft
 |
| Fixture with mounted rim |
Changing the tire of such a wheel is difficult, since there is no easy way to clamp down the rim. We have that case for the 8 in. wheels of our Zenith 601HDS, where the rim has delicate cast spokes.
This post describes a fixture that makes the task easy. It holds the wheel in place while we remove or install the tire with two spoons.
 |
| Fixture for holding wheel |
Platform
Use 3/4 in. plywood. Make the piece large enough so that you can hold it down with your feet or knees.
Three Support Blocks
Cut three triangular support blocks shown in the above photo from a short 2x4 piece. Attach them to the platform from below with one drywall screw each.
Glue a patch of rubber shelving material on top of each support block. The soft material assures that the blocks do not scratch the paint of the rim.
Center Bolt and Spacers
The center bolt has the same diameter as the axle holding the wheel in the airplane.
For the mounting of the rim, cut spacer PVC tubing. Place the spacers on the center bolt below and above the rim.
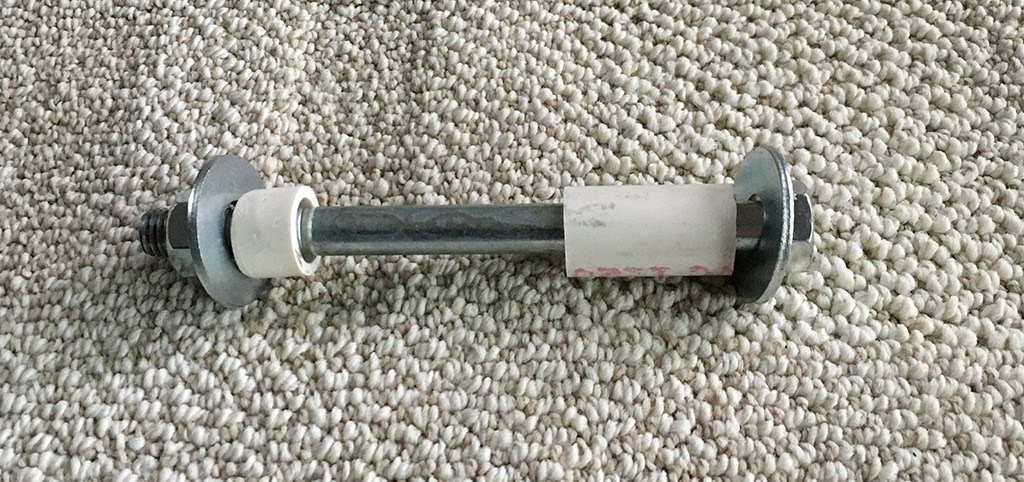 |
| Center bolt with two washers and two spacers |
The length of that spacer is critical. It connects with the bearing of the wheel exactly when the rim settles on the three support blocks.
If later you must handle another rim size, relocate the three blocks and cut additional PVC spacers.
Small Blocks Below Platform
Glue four small wood blocks to the bottom of the platform at the four corners. They assure that the head of the center bolt does not touch the floor.
You then glue Neoprene rubber patches to these blocks to prevent scuffing.
A Nasty Problem
Suppose you have mounted one side of the tire on the rim.
In the next step, you want to insert the inner tube. This requires that you push the valve stem through the hole in the rim. But you cannot do this, since your hand cannot reach far enough into the tire.
Solution
The key is screwing a cap with attached safety wire onto the valve stem.
Make the wire/cap contraption as follows:
- Drill a small hole into a cap, and push a length of safety wire through the hole.
- Twist the wire end into a tight coil that you can pull into the cap, but cannot pull through the hole.
- Mount one side of the tire on the rim.
- Push the wire/cap contraption with cap first into the rim through the valve stem hole.
- Fish out the cap from the tire and screw it onto the valve stem of the tube.
 |
| Inner tube with wire/cap contraption |
- Insert the inner tube into the tire. While doing so, pull the wire steadily through the hole. Eventually the valve stem emerges from the hole.
 |
| Valve cap appears |
The process requires that the hole in the rim accommodates the cap. This is often the case, in particular for the wheels of our airplane.
A Final Thought
Wish we had built the fixture years ago!
Have any questions or feedback about this post? Please share your thoughts in the comments.
A Final Thought
Wish we had built the fixture years ago!
Have any questions or feedback about this post? Please share your thoughts in the comments.


Comments
Post a Comment