Off-Site Exhaust Pipe Repair
You discover that an exhaust pipe of your engine has failed. For example, the pipe has broken apart, going from something like this . . .
. . . to these two pieces. |
| Failed exhaust pipe |
This isn't difficult to fix. You get a replacement for the broken-off segment, cut the pipe appropriately, and weld the two pieces together.
For the fitting and initially tack-welding, you install the two pieces on the airplane, secure them in place, and tack-weld them together.
You remove the resulting single piece, carefully weld what so far has just been tacked together, and get a finished piece that is guaranteed to fit.
But what do you do if the airplane is at a remote airport and you must create the repaired pipe off-site? We recently had that situation, involving a looming engine failure; it was a first for us during 40 years of flying. Here is our six-step solution.
Step 1
You first tack-weld together the two existing pieces so that a one-piece pipe with correct shape results. Of course, this pipe cannot be used in the plane.
Step 2
Using a sheet of high-density styrofoam that home improvement stores sell for insulation, you create a fixture that holds the pipe exactly in place, meaning that the pipe cannot be rotated or shifted sideways, and generally is supported everywhere.
The fixture is built up step by step. Each time you take a small piece of styrofoam, shape it as desired, and glue it with 5-min epoxy to whatever has already been created.
The fixture isn't supposed to win a beauty contest, but must hold the pipe tightly everywhere and prevent any rotation or shifting.
Step 3
You cut off the tack-welded portion of the pipe plus a bit more so that all damaged material is removed.
Step 4
You cut the new pipe portion very carefully so that it looks very much like the piece you just cut off. Then you adapt the new resulting piece so that it can be laid into the fixture together with the other, still-good, portion of the pipe.
Do not change the still-good piece in this process since then you can always lay that piece together with the cut-off damaged part into the fixture for a test.
You do not force anything, but nevertheless must get a tight fit, with virtually no gap between the old and new piece.
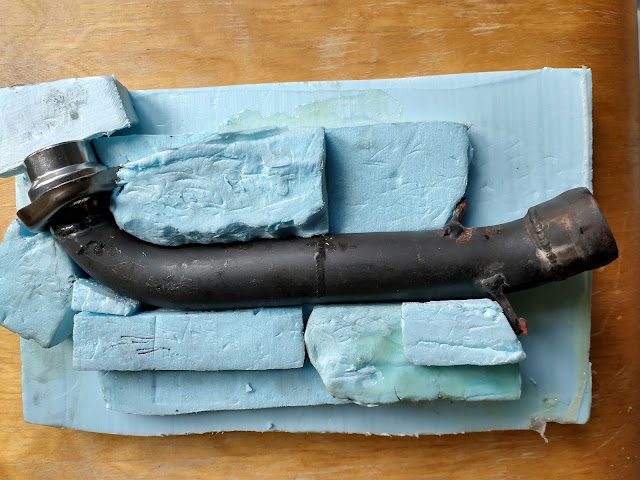
Here is are the two pieces in our admittedly ugly looking, but nevertheless functional fixture. It was built up from pieces of styrofoam left in the shop from an earlier project.
 |
| New piece (left) and old piece (right) in the fixture |
In the picture, the tiny gap between the two pieces is hidden by the flange.
Step 5
You tack-weld the two pieces together while they are in the fixture. Two tacks on the exposed side, then after removal from the fixture, a third tack on the other side.
Put the tacked-together pipe into the fixture for a test. It must easily slip in, yet allow no wiggle.
Step 6
Remove the pipe and permanently weld the two pieces together. The first photo of this post shows the finished pipe.
When nephew-in-law Ryan and I tried to install the repaired pipe in the plane, it fit perfectly. That was important because "off site" meant a four-hour roundtrip flight in a Cessna 150 from the shop to the plane.


Comments
Post a Comment